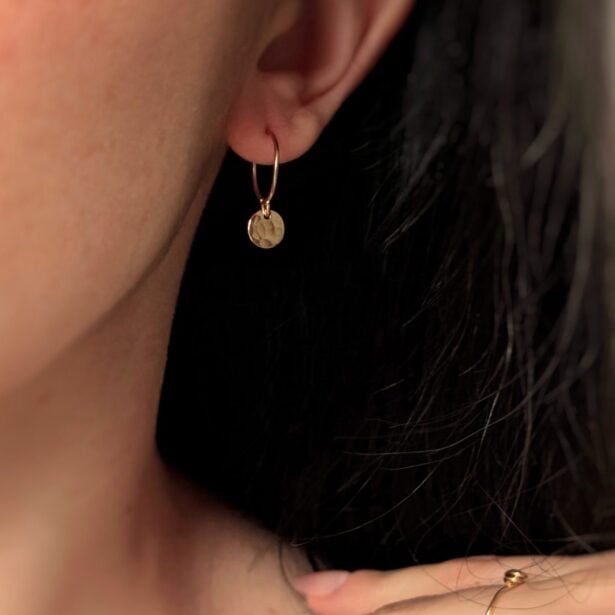
Your sleeper earrings have arrived.
Here’s how to put them on.

Ready? We’ll guide you!

The first time takes a little patience and dexterity — that’s normal! The design is different from anything you’re used to. But you’ll see, it quickly becomes second nature. And once they’re in place, you’ll understand why our customers never take them off.

Prefer step-by-step photos? We’ve got that too.

① Get the hoops ready

Disinfect your studs with rubbing alcohol and let them dry.

Lubricate them. If it’s been a while since you’ve worn earrings, or if you have sensitive ears, apply a small amount of ointment to the ring (like Polysporin). This will help it slide smoothly through the earlobe without forcing it.

② Grab and spread the ends apart.

Place your fingers on each side of the ring, not directly on the ends, and gently spread them apart to the sides, as if you were opening a little mouth.

Good news: your sleeper earrings are resilient and can open a few millimeters without any problem. But the more you spread them, the more you risk distorting the roundness of the ring. The rule? Open just enough for your earlobe to fit through, no more.

③ Slide through and close the hoop.

Gently insert by guiding the ring from the front to the back of the earlobe.


Bring the two ends toward each other. You can push them slightly past each other, then ease back so they align perfectly.

Once in place — you can do anything.

You can wear them…
☀️ Day and night
🚿 Under the shower (it cleans them!)
🏊🏼‍♀️ To the pool (occasionally)
💪🏻 At the gym
🎧 With headphones
🏍️ Under a bikeor snowboard helmet

However, do avoid …
❌ Heavily chlorinated pools and bromine spas on a regular basis
❌ Corrosive cleaning products
❌ Direct contact with perfumes and creams

What to expect after putting the hoops in

An adjustment period is necessary

Slight redness, sensitivity, or warmth after putting them in? That’s completely normal, especially if it’s been a while since you’ve worn earrings.

These sensations will disappear within a few hours to a few days.

· Keep your sleeper earrings in place.
· Gently clean with warm water or a saline solution.
· Apply a little soothing ointment as needed to reduce discomfort.
· And most importantly: avoid touching the ring unnecessarily.

hen to worry: the signs of a true allergic reaction

An allergic reaction is more intense, it comes on quickly, and it doesn’t improve over time.

· Redness that worsens over time
· Significant swelling around the earlobe
· Intense and persistent heat
· Itching that doesn’t go away
· Discharge

If this occurs, remove the sleeper earrings.

Frequently asked questions

Gently rotate the ring in your earlobe; it should glide freely without catching. If you feel no resistance and there is no visible gap between the two ends, you’re good.

If not, remove the earrings from your ears and reshape the ring. How? Watch the video below!

Here are the steps: slightly reopen the rings, bring the two ends toward each other and push them slightly past each other, then ease back so they align perfectly.

We recommend waiting until your piercing is fully healed before wearing our sleeper earrings. The installation process requires a little manipulation — it’s better not to irritate a healing earlobe. In general, it is suggested to wait six months before changing a new piercing, but it is possible that your earlobe may take up to a year to be fully healed.

Daily cleaning — removing sebum and residue.

A quick rinse under warm water during your shower is enough for the daily upkeep of your sleeper earrings. For a deeper clean, gently wipe with a slightly damp soft cloth.

Restoring their shine — polishing gold-filled and silver

Over time, gold can lose a little of its shine, and silver will eventually tarnish. These are normal occurrences. A jewelry polishing file (the most effective), or a polishing cloth, will restore your sleeper earrings’ shine in just a few seconds. A little effort every now and then and they’ll sparkle like the first day.

Our sleeper earrings are designed to be worn for a long time, several months without interruption. That’s their natural way of being worn, and it’s what keeps them in shape!

Taking them out occasionally to wear other pairs? No problem. But taking them out and putting them back in every evening/morning — that’s where the risk of deformation increases, as each opening puts stress on the metal, even with the right technique.

Good news: the rounded shape of the ring makes it naturally resilient to spreading. As long as you use the right technique — a lateral spread (not a twist) — and limit unnecessary handling, your sleeper earrings will keep their shape for a long time.

Something’s wrong?

This is often caused by a twist instead of a lateral spread. Place the ring flat on a hard surface and gently press with your fingernail to restore its rounded shape. If that doesn’t work, write to us — we’ll be happy to guide you.

Spread the sides apart slightly, then close them slowly by pushing them a little past each other before easing them back. This small movement brings them back into alignment.

This is almost always due to a gap between the two ends. Check the alignment and close it properly — once the ends are perfectly joined, there is nothing left to catch on.

Try applying a little ointment to the ring (if you can) — it slides much more easily. If your piercing is recent or it’s been a long time since you’ve worn earrings, give yourself a few days to let your earlobe readjust.

Got any other concerns? Read our FAQ or write to us!

Complete your Pease look